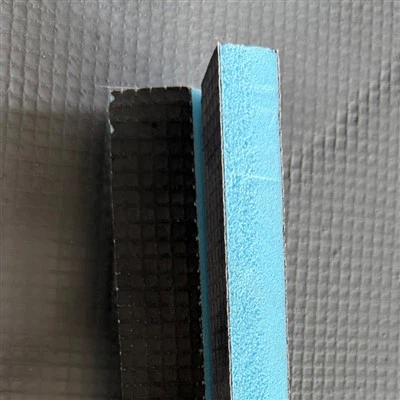

Hey there! As a supplier of Waterproof Tile Backer, I'm super stoked to share with you how to install waterproof tile backer on a wooden surface. It's a crucial step when you're looking to spruce up your space with tiles, especially in areas prone to moisture like bathrooms and kitchens. So, let's dive right in!
Why Use Waterproof Tile Backer?
Before we get into the nitty - gritty of installation, let's talk about why you should use a waterproof tile backer. A Waterproof Tile Backer acts as a protective layer between your wooden surface and the tiles. Wood is porous and can absorb water, which can lead to warping, rotting, and mold growth over time. A waterproof tile backer prevents water from seeping into the wood, ensuring the longevity of your tile installation and the structural integrity of your wooden subfloor or wall.
Tools and Materials You'll Need
- Tools:
- Measuring tape
- Utility knife
- Circular saw (for larger cuts)
- Drill
- Screwdriver or screw gun
- Level
- Notched trowel
- Materials:
- Waterproof Tile Backer Board
- Backer board screws
- Thinset mortar
- Fiberglass mesh tape
Step 1: Prepare the Wooden Surface
The first thing you need to do is make sure your wooden surface is clean, dry, and flat. Remove any dirt, dust, or debris from the wood. If there are any bumps or uneven areas, sand them down. Check the surface with a level to ensure it's as flat as possible. If the wood is warped or damaged, you may need to replace the affected sections before proceeding.
Step 2: Measure and Cut the Backer Board
Measure the area where you'll be installing the tile backer. Use a measuring tape to get accurate dimensions. When cutting the Waterproof Tile Backer Board, you can use a utility knife for smaller cuts. Score the board along the cut line several times, then snap it along the scored line. For larger cuts, a circular saw with a carbide - tipped blade is a better option. Make sure to wear safety goggles and a dust mask when cutting the board to protect yourself from dust.
Step 3: Position the Backer Board
Lay the cut backer board on the wooden surface. Leave a 1/8 - inch gap between the board and the walls or other fixed objects to allow for expansion. Make sure the edges of the backer boards are staggered, similar to how bricks are laid in a wall. This helps to prevent any weak points in the installation.
Step 4: Secure the Backer Board
Once the backer board is in position, it's time to secure it to the wooden surface. Use backer board screws to attach the board. Place the screws about 8 inches apart along the edges of the board and 12 inches apart in the field of the board. Make sure the screws are countersunk so they're flush with the surface of the backer board. Don't over - tighten the screws, as this can crack the board.
Step 5: Tape the Seams
After all the backer boards are installed, you need to tape the seams. Apply a thin layer of thinset mortar over the seams using a notched trowel. Then, press a strip of fiberglass mesh tape into the mortar, making sure it's fully embedded. Smooth out any air bubbles or wrinkles in the tape. Apply another thin layer of thinset mortar over the tape to cover it completely.
Step 6: Check for Levelness
Use a level to check the surface of the installed backer boards. If there are any high or low spots, you can use a grinder or sandpaper to level them out. A flat surface is crucial for a successful tile installation.
Step 7: Let the Thinset Dry
Allow the thinset mortar to dry according to the manufacturer's instructions. This usually takes about 24 hours, but it can vary depending on the type of thinset and the environmental conditions.
Step 8: Install the Tiles
Once the thinset is dry, you're ready to install the tiles. Apply thinset mortar to the backer board using a notched trowel. Press the tiles into the mortar, making sure they're level and evenly spaced. Use tile spacers to maintain consistent spacing between the tiles. After all the tiles are installed, let the thinset dry again before grouting.
Tips and Tricks
- When handling the backer board, be careful not to drop it or subject it to excessive force, as it can crack.
- Wear gloves when working with the backer board to protect your hands from the rough edges.
- If you're installing backer board on a wall, make sure to support it properly until the screws are in place.
- Always follow the manufacturer's instructions for all the materials you're using, including the backer board, screws, thinset, and tiles.
Conclusion
Installing Waterproof Tile Backer on a wooden surface is a great way to ensure a long - lasting and moisture - resistant tile installation. By following these steps and using high - quality materials, you can transform your space with beautiful tiles that will stand the test of time.
If you're interested in purchasing Tile Backer Boards or have any questions about our products, don't hesitate to reach out. We're here to help you with all your tile backer needs. Whether you're a DIY enthusiast or a professional contractor, we've got the right products for you. Let's work together to make your project a success!


References
- "Tile Installation Handbook" by the Tile Council of North America
- Manufacturer's installation guides for Waterproof Tile Backer products