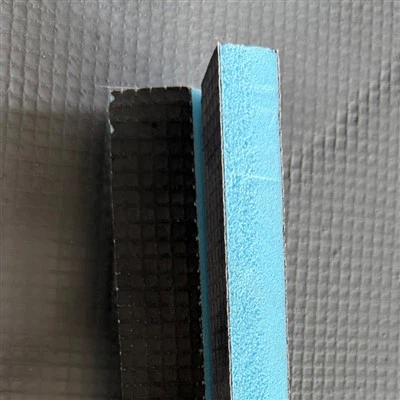

Hey everyone! If you’re diving into a bathroom remodel, kitchen backsplash, or even an exterior wall project, I bet you’ve come across Goboard Tile Backer Board at some point. As a supplier who’s been chatting with contractors, DIYers, and homeowners about this stuff for years, one question pops up more than any other: “Do I need to prime Goboard before tiling?” Let’s break this down—no fancy jargon, just real talk based on what I’ve seen work (and what’s saved people from messy, costly mistakes).
First off, let’s get on the same page about what Goboard actually is, because that’s key here. It’s a tile backer board made for waterproof, moisture-heavy areas like showers, steam rooms, and around sinks. Unlike old cement board that’s super heavy and messy to cut, Goboard is lightweight, durable, and built to stand up to water exposure. But here’s the thing: priming isn’t one-size-fits-all—how you prime (or if you even need to do it) depends on where you’re installing it, what kind of tile adhesive you’re using, and the specific Goboard product you’ve got.
Let’s start with the basics of why priming tile backer board matters in the first place. Priming creates a bond between the board’s surface and your tile adhesive (that stuff holds your tiles up, so it’s non-negotiable). If the board’s surface is too smooth, or if it’s porous in a way that sucks moisture out of the adhesive too fast, you’re gonna end up with loose tiles, cracking, or even water getting behind the board (which defeats the whole purpose of using a waterproof backer like Goboard). But wait—does that apply to Goboard specifically?
I’ve had so many customers ask me: “Wait, I thought Goboard was a waterproof backer board for shower use—does that mean it’s already prepped?” Short answer: sometimes yes, sometimes no. Let’s talk about different installation scenarios because that’s where most people get confused.


If you’re tiling a shower—one of the most common uses for Goboard—let’s dive in. Our Waterproof Backer Board for Shower line of Goboard products: some come with a factory-applied primer, others don’t. The 6mm version, for example, is super popular for small shower stalls and niche walls. If you grab our Waterproof Tile Backer Board 6mm, check the label—if it’s marked “pre-primed,” you can skip priming. But if it’s not, you’ll need to apply a latex-modified primer (not regular paint primer, trust me—paint primer doesn’t work here) before spreading your thinset adhesive. Why? The 6mm Goboard has a smooth, non-porous surface from its moisture-resistant coating, so the thinset won’t grip right without that primer layer. I’ve seen DIYers skip this step on shower walls and end up with tiles falling off within a year—avoid that at all costs.
Now, what about less “extreme” wet areas, like a kitchen backsplash or a bathroom wall above a vanity? Here, our Water Resistant Foam Backer Board Goboard is a top pick because it’s even lighter than the cement-based options. For foam Goboard, priming is usually not required—wait, hold on, let me clarify that. The foam core has a slightly textured surface that thinset grips well, but if you’re using a large-format tile (like 12x24 or bigger), you might want to add a thin skim coat of thinset first, which is kind of like a light primer step. Why? Large tiles need a super strong bond, and the foam Goboard’s texture might not be enough on its own for those heavy tiles. But for small subway tiles or mosaic backsplashes, you can totally skip priming the foam Goboard. I had a customer last month who tiled a whole kitchen backsplash with our water-resistant foam Goboard, no primer, and it’s still holding strong after 6 months—so that’s a real example, not just theory.
What if you’re taking Goboard outside? Like for an exterior wall waterproof backer board installation? Oh, that’s a different story. Our Exterior Wall Waterproof Backer Board Goboard is built to handle harsh outdoor conditions—sun, rain, temperature changes—but priming is non-negotiable here. Why? Exposed Goboard (even the exterior grade) can develop a fine chalky residue from UV exposure over time, and that residue will break down the adhesive. Plus, exterior installations need an extra layer of protection against water seepage, so a primer acts as a moisture barrier too. I always tell contractors working on patio walls or exterior facades to use a flexible acrylic primer when prepping their exterior Goboard—flexible because it moves a little with the wall, which prevents cracking from temperature shifts.
Wait, let’s circle back to shower wet areas specifically, because that’s where people panic the most. Our Shower Wet Area Backer Board Goboard is the most popular product we sell, and I get at least 5 questions a week about priming it. Here’s the rule of thumb for shower wet areas: if you’re using a thin-set adhesive that’s specifically labeled for use with waterproof backer board, check the adhesive’s instructions. Most thin-sets will say whether you need to prime. If the Goboard is not pre-primed, you have two options: either use a self-prining thinset (some brands make these—they have a primer mixed right in) or apply a separate primer first. I always recommend the separate primer for showers, though, because it adds an extra layer of security. Showers get a lot of constant moisture, so you don’t want to cut corners here. Loose tiles in a shower can lead to water getting behind the wall, which can cause mold or rot—way bigger headache than taking 20 extra minutes to prime.
Now, let’s talk about common mistakes I see people make when priming Goboard. First, using the wrong primer. Regular interior paint primer is not the same as a tile backer board primer—paint primer is for adhesion to dry surfaces, not moisture-heavy ones. You need a primer that’s water-resistant and compatible with thinset. Second, not letting the primer dry fully. I’ve had a guy tell me he primed his shower walls in the morning and tiled that afternoon—big no-no. Most Goboard primers take 24 hours to dry completely, especially in humid areas like bathrooms. If you tile before the primer is dry, the moisture in the primer will get trapped between the board and adhesive, leading to poor bond. Third, priming over dirt or dust. If you cut your Goboard panels (which you will, since no wall is perfectly measured), the cut edges are slightly dusty. You need to wipe those edges down with a damp cloth (let them dry!) before priming—if you prime over dust, the primer won’t stick, and neither will your tiles.
Wait, what about Goboard’s edges? That’s another thing people overlook. When you cut Goboard, you expose the core, which is a little more porous than the factory surface. Even if you primed the rest of the board, those cut edges need a little extra attention. I always tell customers to either apply a coat of primer to the cut edges, or use a clear silicone caulk to seal them before tiling. Why? Because water can seep into the cut edges, even on waterproof Goboard, and that’s the most common place for water damage to start. That’s a quick step that saves you from a lot of problems down the line—trust me, I’ve seen way too many people skip that and regret it.
Let’s also compare Goboard to old cement board, just to clear up confusion. Cement board (like HardieBacker) is super porous, so it always needs to be primed before tiling. But Goboard is a different material—its waterproof coating makes it less porous, so sometimes you can skip priming. That’s why it’s important to not just follow the old rules from cement board; adjust for Goboard’s specific properties.
Now, let’s get practical: step-by-step quick guide for Goboard priming, depending on use case. If you’re tiling a shower with non-pre-primed Goboard: 1) Wipe down all panels and cut edges with a dry cloth (no water, you want the surface dry). 2) Apply a latex-modified primer with a roller or brush—don’t use a sprayer, it’ll make a mess. 3) Let it dry for 24 hours. 4) Tiling time. If you’re tiling a kitchen backsplash with foam Goboard: 1) Wipe panels with a damp cloth, let dry 1 hour. 2) Optional: skim coat a thin layer of thinset for large tiles, no primer needed for small tiles. If you’re tiling an exterior wall with Goboard: 1) Clean panels to remove any chalky residue. 2) Apply a flexible acrylic primer. 3) Let dry 24 hours. 4) Tiling. That’s it—simple, no overcomplicating.
As a Goboard supplier, I’ve tested all these scenarios myself (I have a small test wall in my garage that I’ve been messing with for years), so I’m not just telling you stuff I read online. I’ve seen the difference between primed and unprimed Goboard, in all kinds of environments. The key takeaway here is: priming Goboard isn’t a mandatory step across the board, but it is in some cases—and ignoring those cases will cost you way more than the time and money it takes to do it right.
If you’re still unsure whether your Goboard needs priming for your project, I’m here to help. Whether you’re a contractor needing bulk orders of our Goboard products, a DIYer with a small project, or someone who has questions about the best product for their space, reach out to us to connect and chat through your needs. We can help you pick the right Goboard product, give specific priming tips for your exact installation, and make sure your project goes smoothly without any tile-related headaches.
References:
- Tile Council of North America. (2021). Handbook for Ceramic Tile Installation. TCNA.
- Goboard Technical Data Sheet. (2023). Waterproof Tile Backer Board Installation Guidelines. Goboard Inc.
- American Society for Testing and Materials. (2022). Standard Specification for Bonding Agents for Ceramic Tile and Stone. ASTM International.
- Shower and Bath Industry Association. (2022). Waterproofing Guidelines for Residential Bath and Shower Areas. SBIA.
- Exterior Wall Institute. (2023). Best Practices for Backer Board Installation on Outdoor Facades. EWI.