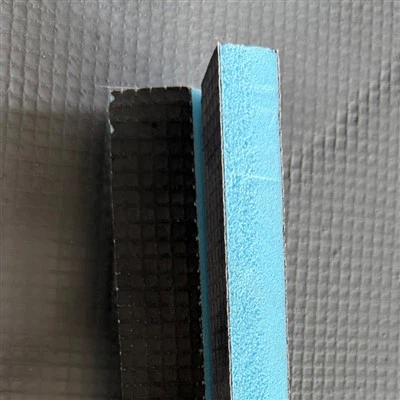

Hey there! I'm a supplier of waterproof backer boards, and I often get asked about how to install these boards around plumbing fixtures. It's a crucial step in any bathroom or kitchen renovation project, as it helps prevent water damage and ensures the longevity of your tiles. In this blog post, I'll walk you through the process step by step, sharing some tips and tricks along the way.
Why You Need a Waterproof Backer Board Around Plumbing Fixtures
Before we dive into the installation process, let's talk about why you need a waterproof backer board around plumbing fixtures. Water is the enemy of any building material, and when it seeps behind your tiles, it can cause mold, mildew, and rot. This not only looks bad but can also pose a health risk. A waterproof backer board acts as a barrier between the water and the underlying structure, protecting your walls and floors from damage.
Tools and Materials You'll Need
- Waterproof Tile Backer Boards
- Measuring tape
- Utility knife
- Straight edge
- Drill
- Screwdriver
- Caulk gun
- Silicone caulk
- Backer board screws
- Safety goggles
- Dust mask
Step 1: Measure and Cut the Backer Board
The first step is to measure the area around the plumbing fixtures where you'll be installing the backer board. Use a measuring tape to get accurate measurements, and mark them on the backer board with a pencil. Then, use a utility knife and a straight edge to cut the backer board to size. Make sure to wear safety goggles and a dust mask when cutting the board to protect yourself from dust and debris.
Step 2: Prepare the Surface
Once you've cut the backer board, it's time to prepare the surface where you'll be installing it. Remove any old tiles, wallpaper, or other materials from the wall or floor, and make sure the surface is clean, dry, and level. If there are any holes or cracks in the surface, fill them with spackle or joint compound and let them dry completely.
Step 3: Install the Backer Board
Now it's time to install the backer board. Start by applying a bead of silicone caulk around the edges of the backer board, and then press it firmly against the wall or floor. Use a drill and backer board screws to secure the board to the surface, spacing the screws about 6 inches apart. Make sure the board is level and flush with the surrounding surface.
Step 4: Cut Holes for the Plumbing Fixtures
Once the backer board is installed, you'll need to cut holes for the plumbing fixtures. Use a hole saw or a jigsaw to cut the holes, making sure they're the right size and shape for the fixtures. You may need to use a file or sandpaper to smooth the edges of the holes.
Step 5: Seal the Edges and Seams
After cutting the holes for the plumbing fixtures, it's important to seal the edges and seams of the backer board to prevent water from seeping behind it. Use a caulk gun to apply a bead of silicone caulk around the edges of the board and along the seams where the boards meet. Make sure to smooth the caulk with a putty knife or your finger to create a watertight seal.


Step 6: Install the Tiles
Once the caulk has dried, you're ready to install the tiles. Apply a layer of thin-set mortar to the backer board using a notched trowel, and then press the tiles into the mortar, starting at the bottom and working your way up. Use tile spacers to ensure the tiles are evenly spaced, and use a level to make sure they're straight.
Step 7: Grout the Tiles
After the tiles have been installed and the mortar has dried, it's time to grout the tiles. Mix the grout according to the manufacturer's instructions, and then use a grout float to apply the grout to the tiles, making sure to fill in all the gaps between the tiles. Use a damp sponge to wipe away any excess grout, and then let the grout dry for at least 24 hours.
Tips and Tricks
- Make sure to wear safety goggles and a dust mask when cutting the backer board to protect yourself from dust and debris.
- Use a straight edge and a utility knife to make clean, straight cuts in the backer board.
- Apply a bead of silicone caulk around the edges of the backer board before installing it to create a watertight seal.
- Use backer board screws to secure the board to the surface, spacing the screws about 6 inches apart.
- Cut the holes for the plumbing fixtures before installing the backer board to make the installation process easier.
- Seal the edges and seams of the backer board with silicone caulk to prevent water from seeping behind it.
- Use tile spacers to ensure the tiles are evenly spaced, and use a level to make sure they're straight.
- Let the grout dry for at least 24 hours before using the shower or bathtub.
Different Types of Waterproof Backer Boards
There are several types of waterproof backer boards available on the market, each with its own advantages and disadvantages. Here are some of the most common types:
- Foam Waterproof Backer Board: Foam backer boards are lightweight, easy to cut, and provide excellent insulation. They're also resistant to mold and mildew, making them a popular choice for bathrooms and kitchens.
- Kitchen Countertop Waterproof Backer: These backer boards are specifically designed for use in kitchens, where they provide a sturdy base for countertops and protect against water damage.
- Cement Board: Cement boards are made from a mixture of cement and fiberglass, and they're extremely durable and resistant to water. They're a popular choice for high-traffic areas and areas that are exposed to moisture.
Conclusion
Installing a waterproof backer board around plumbing fixtures is an important step in any bathroom or kitchen renovation project. By following these steps and using the right tools and materials, you can ensure that your backer board is installed correctly and provides long-lasting protection against water damage. If you have any questions or need help choosing the right waterproof backer board for your project, don't hesitate to contact me. I'm here to help you every step of the way. Whether you're a DIY enthusiast or a professional contractor, I've got the products and expertise to meet your needs. So, let's get started on your next project together!
References
- "Waterproofing for Tile and Stone Installations." Tile Council of North America.
- "Installation Guide for Waterproof Backer Boards." Manufacturer's Instructions.